I recently attended a Stampin, Up! Conference in Canberra, one of the major events is the swapping of cards. This gives us inspirations to help keep our creative juices flowing. I hadnt realised just how hard it is to produce card after card until i started to run my own classes. Have to tell you I love doing them and helping ladies learn the art of making their own cards.
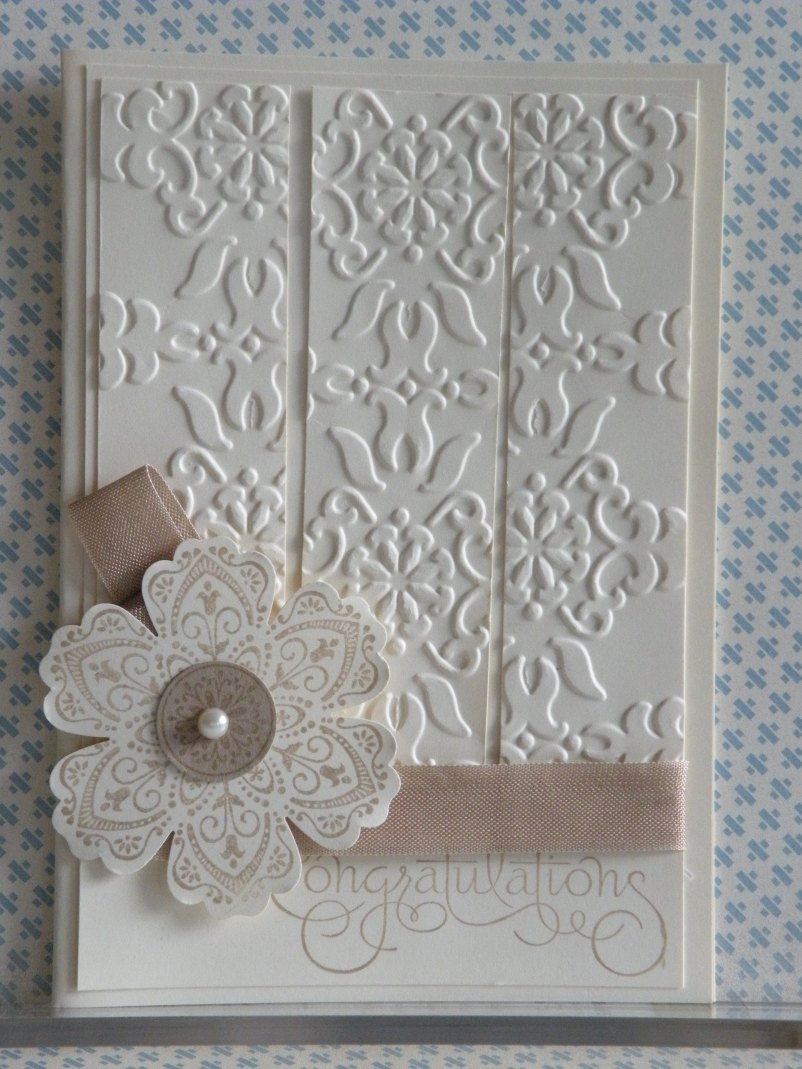
This is a card that received from the talented Marelle Taylor I thought it was very elegant and i am sure you will also. I also recently made it and the instructions for a team meeting that i attended with many talented ladies from Teneale Williams Team. Check her out at tenealewilliams.com.au
Cardstock: Very Vanilla and Crumb Cake
Ribbon : Crumb Cake
Embossing Folder Vintage Wallpaper
Punch’s 1”Circle Punch and the Blossom Punch.
Stamp Set : Mixed Bunch
Suggested Greetings: Loving Thoughts or Well Scripted
Instructions: Fold your base card in half.
Take piece that is 9cm x 9cm and put through the big shot using the Vintage Wallpaper folder. Then cut into 3 pieces, equally. (at 3cm) Take these at attaché to the piece of cardstock that is approx 10cm x 15 cm to the outside side firstly slightly in from each boarder and just equally down from the top. Then position the enter piece.
Bearing in mind that your greeting will be at the bottom with part of the flower hanging below the ribbon, choose one that doesn’t extend right across the card. After stamping your greeting attach your ribbon, secured at the back of the card front with tape. This card front can now be attached to your Card……………………………easy and the ladies love it.
Stamp a flower on cardstock and punch out. Stamp a centre on to crumb cake using crumb cake in and using the circle punch to cut it. Attach the circle to your flower ( you can mount this on just tape to the flower) Put a pearl in the middle of the circle. To make the little bit of ribbon sticking out of the flower, i just used a piece of ribbon that was 15cm long and looped it then stuck with tape. This is then attached to the back of your flower, which then has foam mount attached to it. Lastly attach to your card.

