BlogHop 76

Hello and welcome to this 76 BlogHop on this lovely Easter Sunday. Now you would expect that we might do an Easter Card………………Sad Face, no I didn’t.
Here is the sketch that Teneale has given us to use, I rather like being given a sketch as a starting point for a card.

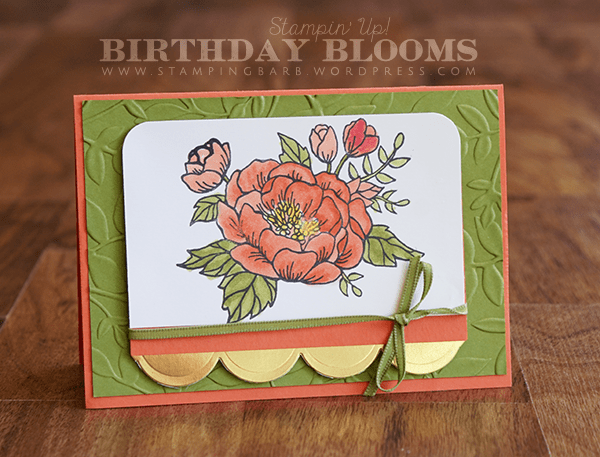
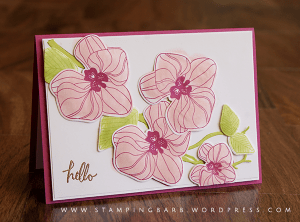
I decided to pull out an older stamp set, Sweet Cupcake, been sitting on my desk and though as I am always after birthday cards I should use it.


Now as you might realise, its a 3 step stamping set, Grrrrrrrrrr you say.  Not a problem with the new Stampin’ Up! Stamparatus.

I have miss placed my original one, but still had one of the plates, I must have put it in a safe place and am sure I will find it soon.  Anyway I have just received my second one, so no problem, I was able to set up the 3 stamps one on each please and on the opposite side the ice for the top of the cake.

Now how easy would that make your class?


Now did I get the sketch right?  Please leave a comment, we love comments.  Good or bad.

Hope your had a lovely Easter, I know I have.  Kids have just gone home after being stuffed with Chocolate.

Now your off to see what Teneale has made for us.


Inkspired Artist Bloghop 73

Hi and Welcome to another Bloghop of the Inkspired Artists, this is our 73rd one and that means we have been hopping along for??? not sure of how long, but definitely a while.Above is our sketch that Teneale has designed for us, quite an interesting one really, with the splash across it and a sentiment.

Did think a little about the splash, then it came to me, it didn’t have to be a splash as such, it could represent a large word.  Maybe the word could be Sorry.

I work colleague has recently and very suddenly this week lost his wife.  She loved purple and he has asked that her funeral be a sea of purple, I know he is really struggling and a nicer person you could go a long way to meet.

So in memory of Sue, this is for Glenn…………….I am sad and sorry for your loss.  God Bless you and your family.

Now I will quietly lead you off to Teneale and see what she has for you.

Inkspired Blog Hop 66

Hello and welcome to the 66 Blog Hop of the Inkspired Artists.  As I write this I have just returned from a fun trip up to Newcastle, lucky the card was made and just waiting for me to come and write the post.

Here is our sketch, rather an easy or interesting one, depending your thoughts.  Lets go see what I have done.

I choose to use the Blends on the Birthday Blooms stamp set, its been around for a couple of years, but for me its a keeper.  I have used it man times with the markers as well as the reinkers to color the flower.  This time I used the Blends on mine and then got the girls in class to water-color it.

Don’t forget if you are using alcohol coloring you need to use Memento Ink, I have written all over mine as I always forget.

Choose the colors of Calypso Coral and Old Olive, not colors that I would normally use.  Am pleased with it.

and for the inside I just stamped and colored the smaller flower.

Now your off to see what Teneale has made for us.


Inkspired Blog Hop 65

Hi and Welcome on this beautiful long weekend, although at work everyone thinks I have a long weekend every week as I only work Tuesday to Thursday……………lol

I do hope you like my card this week, its super special, well I think it is.

By Barbara Williams | Stampin' Up! Tree Rings Background Stamp

Here is our sketch, have to say I love it.  Thanks Teneale.

I wanted to showcase and inspired by Teneale Williams, who had taken inspiration from one of my cards using the Marble Background stamp.  I loved it and it became my biggest seller, now I have fallen in love with the Tree Rings Background stamp, lets see what I have done with it.

By Barbara Williams | Stampin' Up! Tree Rings Background Stamp
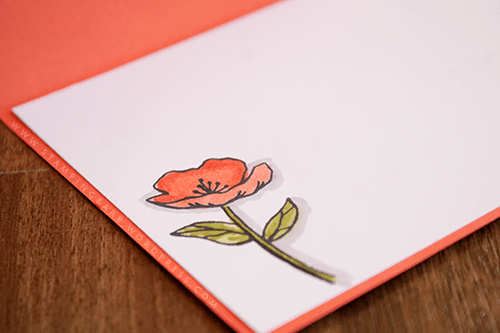
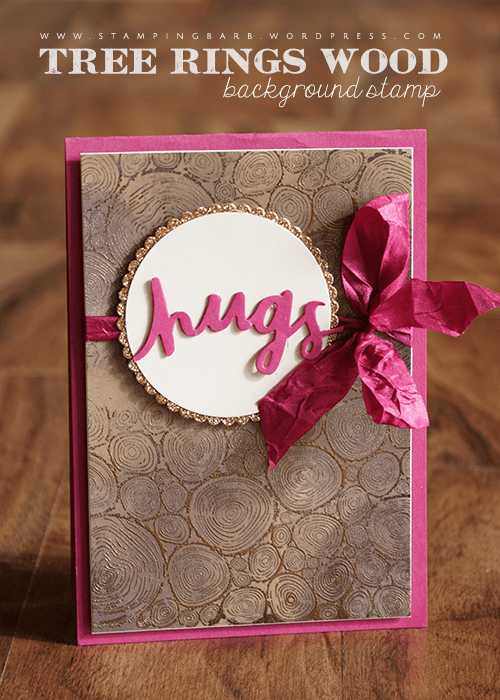
Well I can see that I need to bring out my bone folder for beginnings, see those crinkly top fold, if I had used it, I would have had a nice crisp edge.  Its such a easy technique of stamping embossing and sponging, all my ladies loved it.

I used the Lovely Words Thinlits with the layering circles for the centre of the card and some of the gorgeous Crinkled Seam Binding Ribbon in the Berry Burst color.

By Barbara Williams | Stampin' Up! Tree Rings Background Stamp

Close up of the detail on the card, do you like it?  Now your off to see what Teneale has made for us today.

Please leave a comment, we love comments and below is a list of items used.

Product List

List of participants

Esad 2017/2018 Favourite

Welcome to the another of the ESAD Blog Hops, this one is to display our favourite item from the New 2017/2018 Annual Stampin, Up! Catalogue, if your come from another blog it was most likely Terri Hawke and I wonder what her favourite is?.

I found it hard to do choose as there are so many that I love, in the end I went with Climbing Orchard, even though I have loved the Marble Background Stamp.

This set has two orchard designs, one was stamped on Powder Pink Card stock using Berry Burst ink, both from the new in colors for 2017-2019.  The leaves were stamp on Lemon Lime Twist Card stock using the Lemon Lime Twist ink.


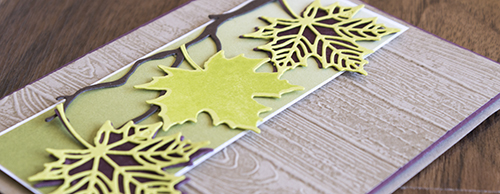
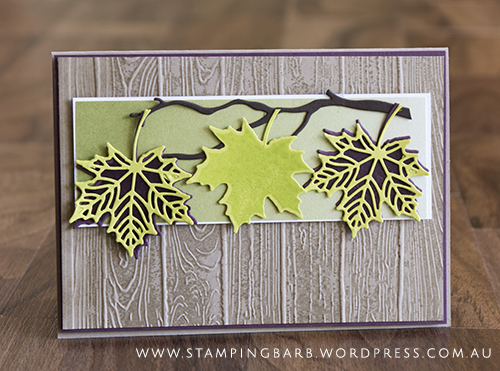
I rather love the branch out of the Seasonal Layers Thinlits, thought it gave another diminution to my projects.  I stamped the Enjoy today with  and then heat embossed using the beautiful Cooper embossing power.  It really pops, don’t you think?

I had stamped onto Crumb Cake Card stock and then added my orchards using Dimensional’s and glue dots.   Did you know Stampin’ Up now have mini Dimensional’s, they come in very handy with this project.


Keeping the theme of the same orchard, I used the Brick Wall embossing folder, smeared with Crumb Cake ink to get a motley effect on the wall and then using the same branch and flowers placed them in a small photo frame.

Such a great little frame to using with some of the Stampin’ Up! projects, as you can see in my photo.  Hope you like them.

I then moved onto the next orchid design in this set, wow can you believe you get so many flower sets in one stamp.

For this card I used Whisper White Cardstock, stamping down with the Berry Burst Ink, using a dabber to color each petal using Power Pink Ink, before cutting them out with the Seasonal Layers Thinlits.

I used the Petal Burst Embossing folder to give the white a background before attaching it to Berry Burst Card base.


Thanks for visiting and now your off to see what Kristal Rimmer has in store for you


Product List

Here is a list of participants, if your lost your way.

Blog hop participants:

1. Josie Dean

2. Nicole Wilson

3. Carolina Evans

4. Kim Oliver

5. Sandra Mastello

6. Lou Kitzelman

7. Kelly Kent

8. Cheryl Algie

9. Rebecca Scurr

10. Sharon Dalton

11. Leonie Schroder

12. Monique Fielder

13. Courtenay Heuston

14. Terri Hawke

15. Barbara Williams 

16. Kristel Rimmer

17. Maree McIntosh

18. Kathryn Ruddick

19. Rosalie Desmond

20. Linda Whalley

21. Amity Knight

22. Peta Stephen

23. Megan Lenske

24. Richelle Fletcher

25. Carly Middleton


Bloghop 59

Welcome everyone, I am rather all over the place at the moment, two weeks home and still trying to get into some sort of order, especially with my stamping.

If you have arrived from another blog, its most likely my good friend Maree, although I don’t seem to have heard from her very much lately, maybe she is off stamping to her hearts content.

Here is our design for this week, I loved it and knew straight away which set I was going to use.

I loved the Seasonal Layers Thinlits and thought that they would be great for this design,

I just love all the new stamps, dies and embossing folders, in this case I used the Pinewood Planks and sponged it with Shara Sand ink on Crumb Cake, wanted it to look like wood.  I mounted this onto a piece of Fresh Fig cardstock (love the new colors), and trimmed to a fine border.  Mounted then onto a Crumb Cake Cardstock.


I used the Fresh Fig to cut out two leaved and then using the outline leaved cut out two leaves in the Lemon Lime Twist, the centre leave I stamped (Colorful Seasons Stamp set) on the Lemon Lime Twist Cardstock with the same color cardstock then cut them out with the die.

All were then mounted onto a piece of the color theory designer services paper stack which had been mounted onto a piece of whisper white cardstock and trimmed with a fine border.

Next your off to check out what Teneale has made for you.